|
Enrolment Quick Reports
|
 
|
|
Enrolment Quick Reports
|
|
Enrolment Quick Reports All "Quick Reports" work in the same
way. First, select an existing report for
editing, or create a new report. Report Types Defining a
Report Give the report
a name (this may be changed later if required). Items for
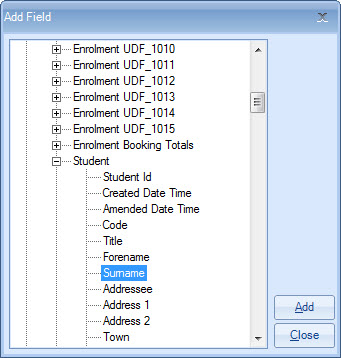
selection are assembled in groups, enrolments, course booking, accommodation
etc. The below shows a section of the
Enrolment Group (sub-section Student). Double-clicking on
the item (Surname) or highlighting it & selecting "Add" will transfer the
item to the report. Main sections of an enrolment
report: Enrolment In the example report being created,
the sections required are: Cancelled enrolments are
automatically excluded. Do the same for Accommodation Booking
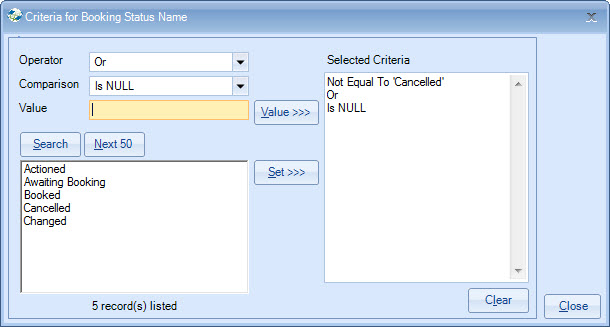
and Transfer Item. By clicking on "Criteria", a list of
the available options will appear. To ensure the system
is able to select students that do not have a course, perhaps just
accommodation, an additional test is required. "Equals to
Null" You can either have the comparison set
as "Equal To", and select all the items to be included, or you could select "Not
Equal To" and select only cancelled (see below): Either of the above will give the
desired result.
If any of the
selected or sort fields are in the wrong order, just highlight the line and drag
it up or down the list.
If you are
unsure about a particular records, highlight it (double-click or select "Edit")
and the enrolment record will be displayed. Subtotalling allows a range of options,
for example, you may wish to count the number of entries shown in Excel on
change of school. Note: Sum
and Average should only be used on numeric fields.
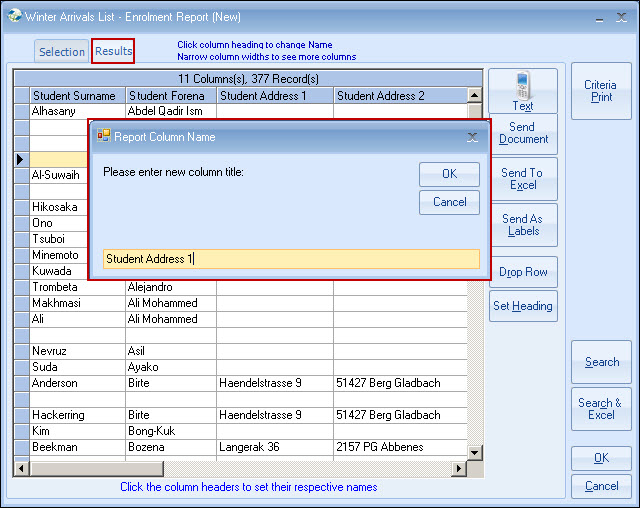
The above output
to Excel can have the headings tidied up, and by repeating the "Search" process,
highlighting the heading needing to be changed, and then changing it.
View Documents If the "Select Now" option is not
set, then the documents are added to the documents for "Batch Printing"
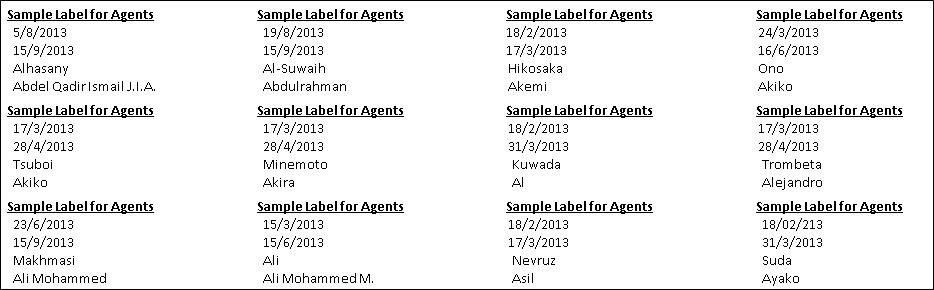
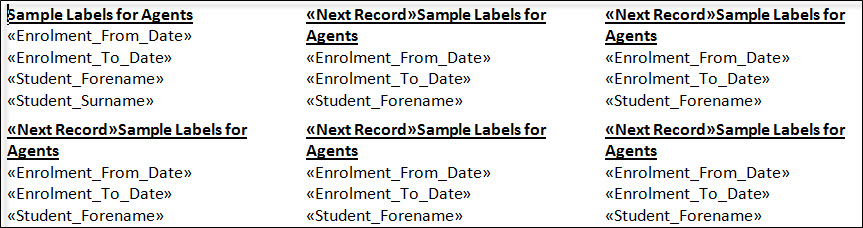
later. Example of Agent
Labels: Templates are in Word and can be
further edited and saved for the next merge. More
detailed explanations: Code Date Filter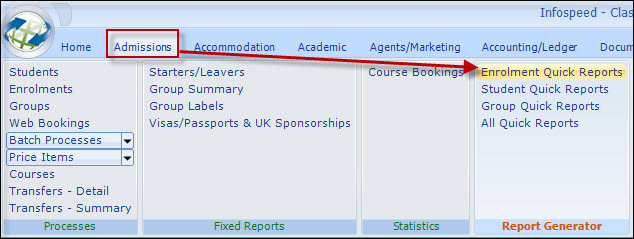
As enrolments are the most common type of report, a very simple
enrolment report, listing all students arriving in a particular week is used
here as an example.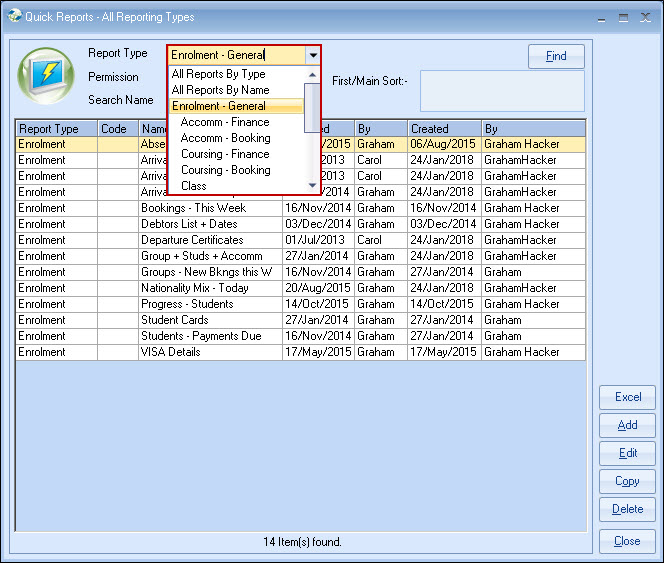
Select
"Enrolment General".
Other enrolment types are listed and differ from the
general type primarily in the "First/Main" sort key.
So for example, if the
report is needed in "Course" order, then Coursing Finance or Booking Report type
should be selected.
By clicking on each type, the sort sequence can be seen.
Selecting the right also affects performance.
Before you start, jot down the items you want to report to
contain, eg:
Surname
Forename
Arrival Date
Coursing Booking
Name
Accommodation Start Date
Accommodation Name
Accommodation HF -
Surname/Forename
Accommodation Address Line 1
Accommodation
Telephone
Transfer Item
Transfer Date
Other headings such as
school, date filter etc. can be ignored for the time being.
Select "Add
Item" and the list box below will be displayed: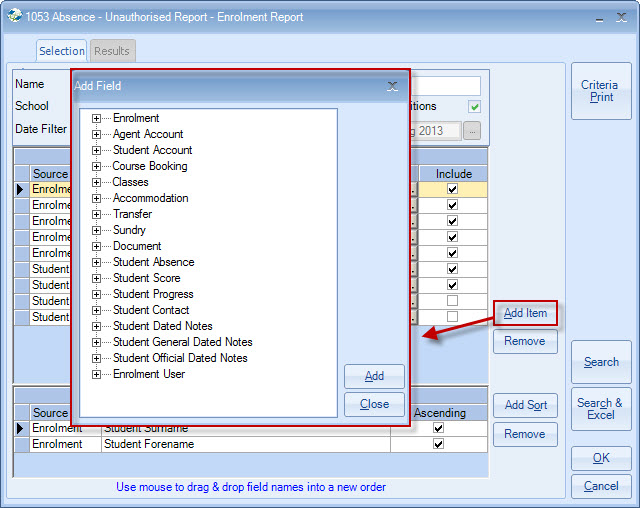
It is a matter of judgement (or trial and error) to select the
appropriate group, and the field within the group that you require.
(Click on the
'+' to open up each section).
This list of items will look something like the
above.
You will need to bear in mind Quick Reports is looking for the
selected records without any knowledge! This means it does not know whether you
want cancelled records included or not.
In this case, cancellation records are not required, so the
system has to be told.
Cancelled
enrolments are automatically
excluded, by the selection of "Exclude" "Cancellations" (see below School/Date
filter)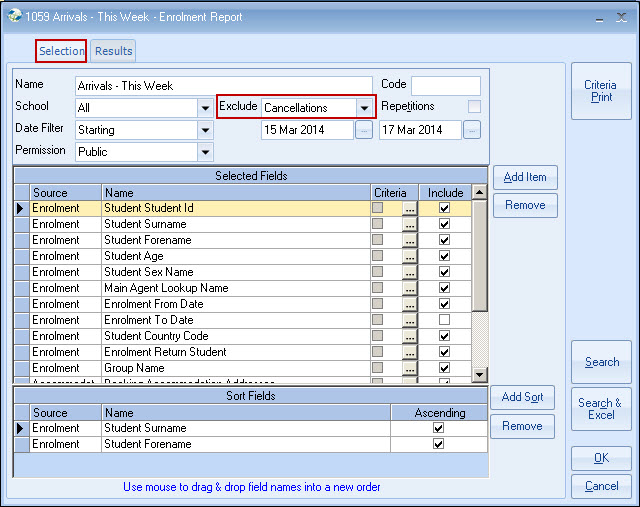
Course Finance
Item
Course Booking Item
Accommodation Finance Item
Accommodation
Booking Item
Transfer Item
Sundry Item
Enrolment
Course Booking
Accommodation
Booking
Transfer Item
However, the detail item, eg. course booking, may be active
or cancelled.
Therefore the status for each of the sections used needs to be
added to the report so a test can be made as to whether the items in each
section are active or not.
Course Booking
Select the Booking
Status Name and add it to the report.
The end of the report will look something like the
following: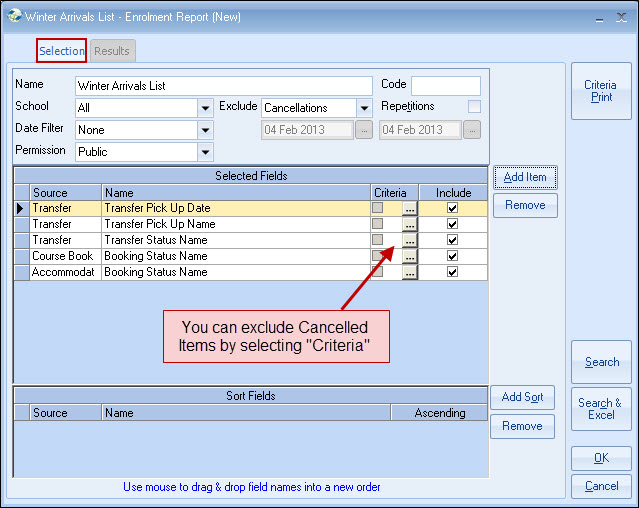
As the "Comparison" is pre-set as "Equal
To", "Active" can be highlighted and "Set" pressed.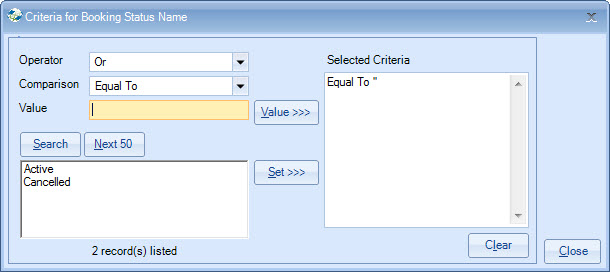
This means that if there is no course ('null' means 'nothing'),
continue to the next test.
Without this test, if the student does not have a
course, the system will not continue to check other elements of the student's
enrolment.
The above principle applies to selecting records that match
to any criteria.
Examples: Selecting specific agents, countries,
courses etc.
Sorting the results:
The selected records must be sorted.
For this exercise, Student Surname and Student Forename are
selected: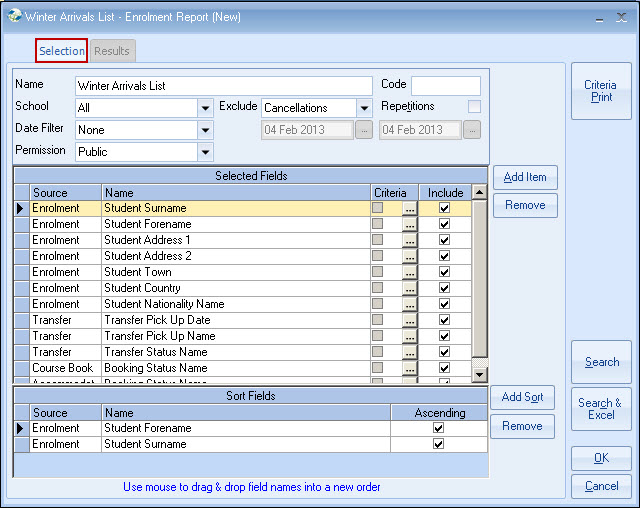
The "Include" column allows items to be included in
the report.
In the above example, the "Status" fields are not required to be
printed (only required for testing), so would NOT be ticked.
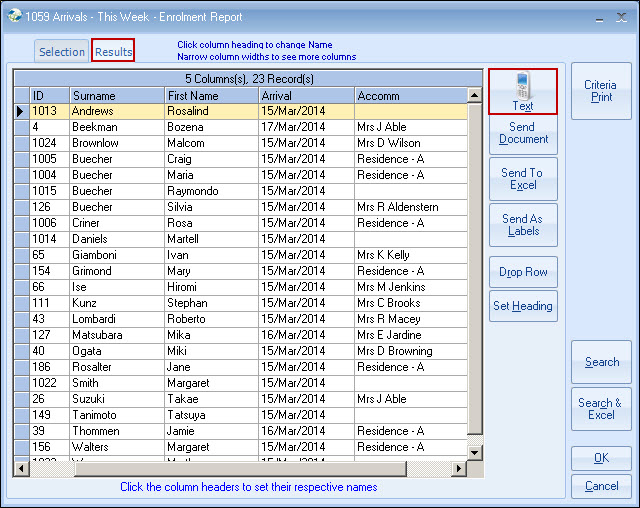
Now you can run
the report by clicking on
"Search", & you will see the below: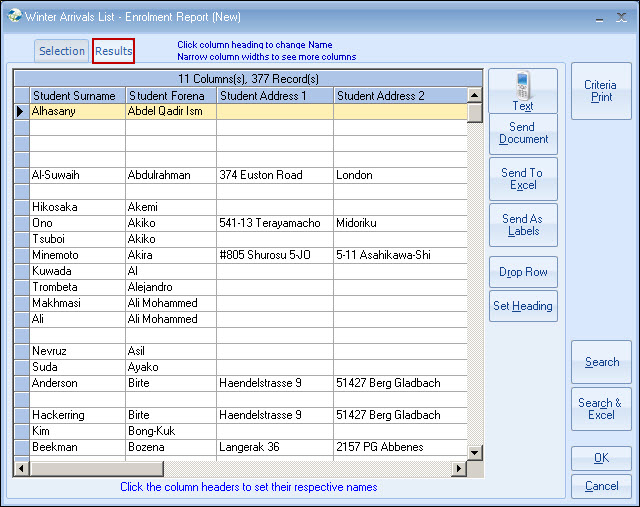
By clicking on "Send to Excel",
you will be presented with the 2 below report options: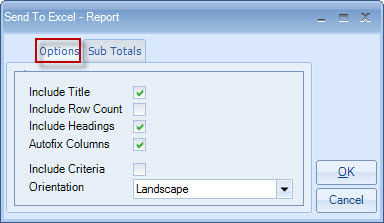
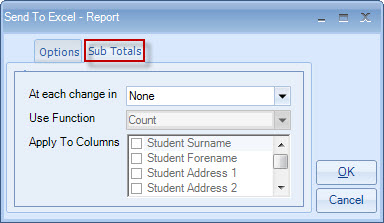
None = no sub total required
Count = show the
number of records found
Sum = show the total for all records
Average =
show the mean value for all record
Maximum = show the largest value of all
records
Minimum = show the smallest value of all records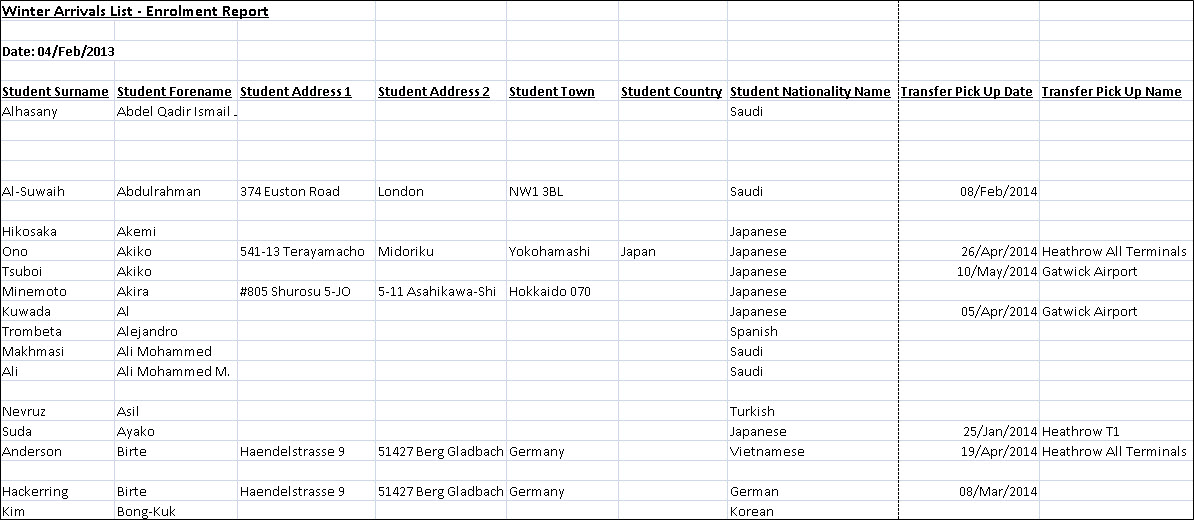
Document
record for the highlighted enrolment is shown, allowing documents to be added,
if required.
Send Document
This small button
is a major feature of the Quick Reports process.
From here, the selected
records can be sent to a document. In the above example, it is a
certificate.
This method could be "Email", so for example if this was a list
of all your French agents, you send all of them a marketing email.
HOW?
Change "Method" to "Email", and then tick the "Send To All" option: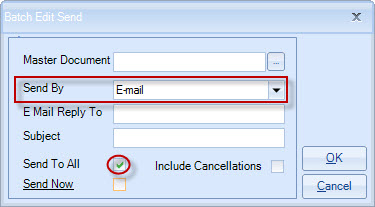
Send As Labels
Fields selected can output as a
label.
Select from the existing list of formats, or select "User Defined",
and create your own design. Header, footers and margin controls are provided.
This is normally all that is required for Name/Address labels.
If more
control over the label is required, then when Word creates the template it can
be further edited at that stage, and saved.
This is useful for example, if
"Labels" are required for say Meal Tickets.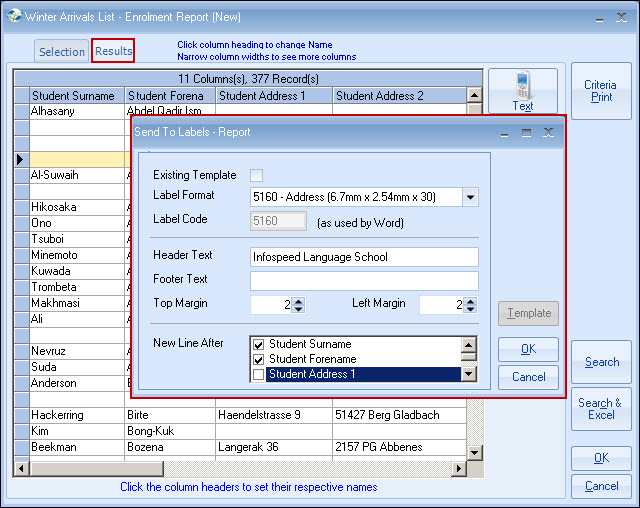

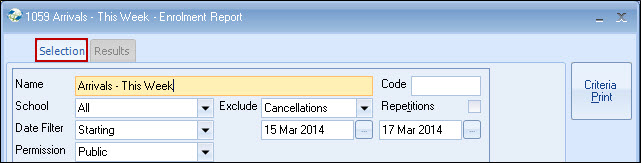
Enter a quick reference code.
Dates are only
used by enrolment reports.
On all other types of report, these fields are
disabled.
Select the type of filter to be used:
None = date filter not
used
Starting = test on a range of arrival dates
Finishing = test on a
range of departure dates
Present = test if student is present between these
dates
If a date filter is used, enter the range of dates to
be included. BOTH dates must be valid.
Repetitions
If selected,
the program checks the matching records after sorting.
If more than 1 record
is identical, only the first will be included.
Note: all selected fields on the record are checked, not
just the sort fields.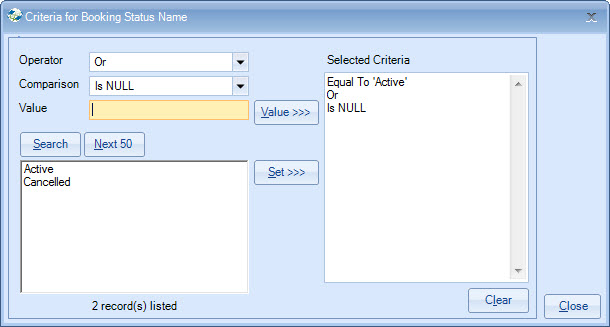
The full current selection
criteria are displayed in the left-hand box.
Operator
If the
selection criteria consists of more than 1 test, an operator of "Or" or "And"
will be required.
Comparison
This is the test to be made
against the value entered.
"Equal To" = record value is the same
as the test value
"Not Equal To" = record value is NOT the same as the test
value
"Greater or Equal" = record value is NOT LESS than the test
value
"Greater Than" = record value is MORE than the test
value
Value
Enter value to be used as a test, if it not
possible to pick from the list in the left-hand box.
Search
The first 50 actual
values for this field are automatically
displayed, so highlight a value and select "Set" (in the above example,
"Active" has been selected)
Next 50
Click to display
the next 50 actual values for this field.
Clear
Click to remove the
current selection criteria.
In
the above example, records will only be included on the report if the booking
status is set to "Active".
Comparisons
More options...
"Less or Equal" =
record value is NOT MORE than the test value
"Less Than" = record value is
LESS than the test value
"Similar To" = text fields only
"Starts With" =
text fields only
"Ends With" = text fields only
"Is Null" = a value is not
present
"Is Not Null" = a value is present
Examples:
For numerical
values 1-9
"Greater or Equal to 3" will exclude 1 and 2
"Less of Equal to
3" will only exclude 1,2 and 3
Similar tests can be applied
to dates and
text fields.
Note: text field sequences are determined by
comparing each character in turn. Each character is tested on its position in
the ASCII conversion table. In this table, letters are in alphabetical sequence,
with all upper case characters before any lower case ones.
Numbers precede any letters. All other print characters do
not have any obvious sequence. These can lead to unexpected results if they are
at the start of the text, eg. the following fields are in ascending
sequence:
"1ABC", "2ABC", "ABCD", "ABDD", "abcd".
The last 3 comparisons
only work for text values.
Similar To "abc" will match
with any record where the field contains "abc" anywhere in the
text.
Starts With "abc" will match with any record where the text
in that field starts with "abc".
Ends With
"abc" will match with any record where the text in that field
ends with "abc".
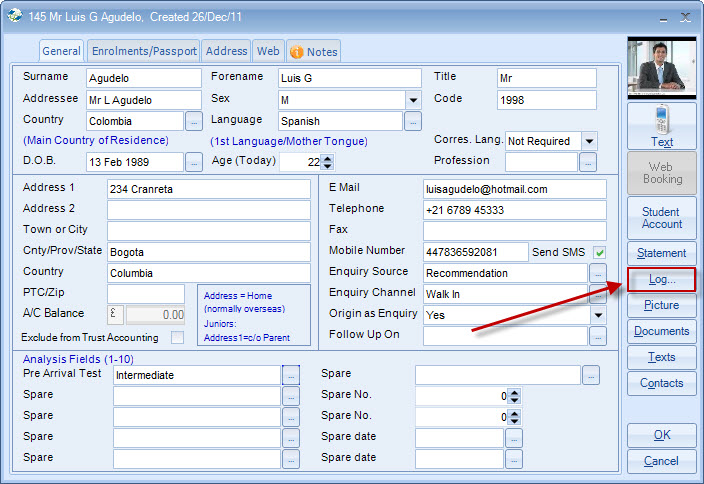
Text Messaging
By clicking on "Text", all students with a mobile phone number will be displayed. Unwanted ones can be "dropped". Click Send.
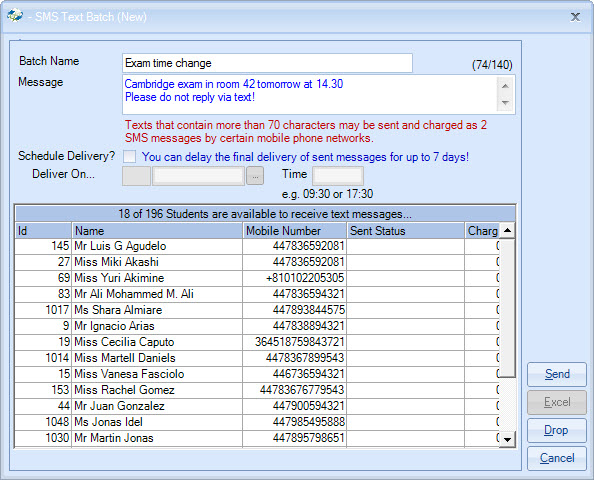
A message will be displayed confirming message has been sent to the network provider (not necessarily received by the mobile phone user), alternatively an error message will be displayed.
A log of texts sent is kept here: