|
Import Agents
|
 
|
|
Import Agents
|
|
Import Agents Overview Import File
Format
The import function allows a file of agents to be
imported into Class.
The file MUST be in 'CSV' format (an Excel file can be
saved in csv format).
Typical uses would be a file of agent enquiries
downloaded from a webpage or a file of agents needing to be added to
Class.
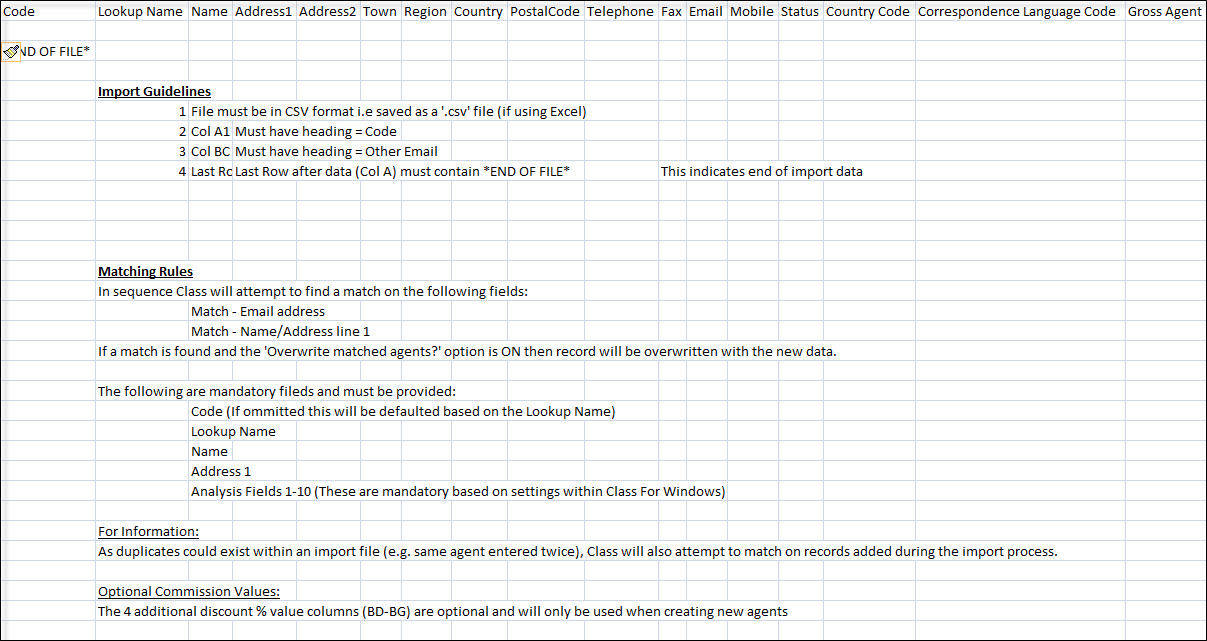
The file to be imported must conform to the format
given in the "Create CSV Template".
Select "Create CSV Template" to see details of the layout
and the rules that are applied.
Additional
information
1. As Class requires an entry in
address line 1, blank address line 1's will be automatically entered as
"*IMPORTED*"
2. If an agent is
matched with an existing record, the agent "status" (Prospective, Active,
Suspended or Inactive) is overwritten to be the same value as defined by
the Import (Prospective, Active, Suspended or Inactive).
A file not
conforming to the above will not be recognised and therefore not imported.
There is no danger if a file is "imported" multiple times as
matching records will be overwritten with the same
information.
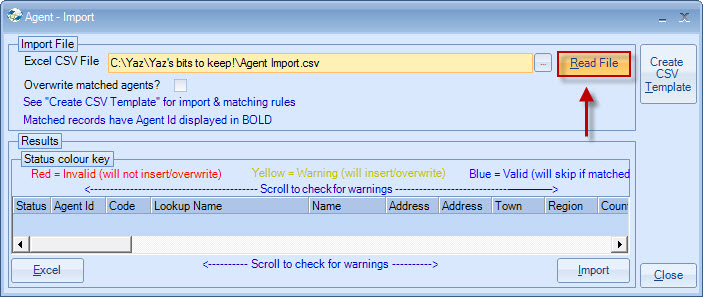
Import Process
Enter the filename, or use the browse button to search
for the import file.
Select "Read File" to initiate the checking process. A count will appear in the
top right hand corner.
On completion, the screen will indicate which records will be imported or rejected.
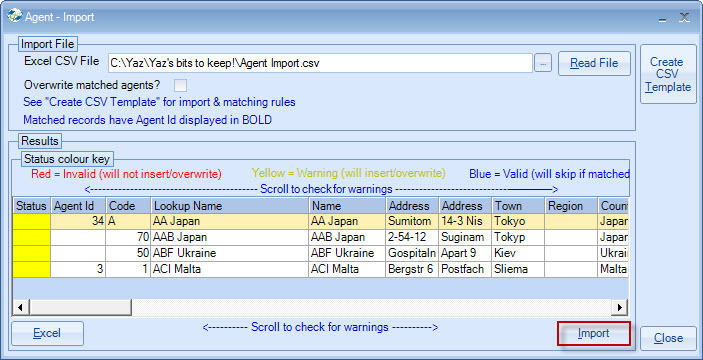
You may need to scroll the screen to see invalid fields,
which will be highlighted with a red background.
Alternatively, the Excel
button can be used to print the results for further scrutiny.
Once satisfied, select
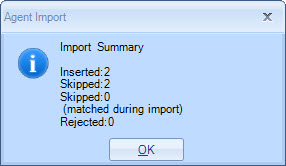
"Import". A Pre-import Summary
will advise the status:

An Import Summary will advise the results of the import:
Copyright 2013
Infospeed Limited