|
Students New
|
 
|
|
Students New
|
|
Students
- New Main Functions Add new or edit existing student
details. Student
Search Before adding a New Student or Enquiry,
the system should be searched for matching names. Enquiries
are shown in blue Once an Enrolment is added to an
Enquiry the Status is automatically changed by the system to Student, and
a conversion recorded. Search first before adding
"New"! Enquiry and Student data is the
same. Enquiries - After entry of an enquiry, a
"student document" is normally merged & sent to the Student. General
Name
Details: Title: Addressee: Sex: Code: Country Language: Date of
Birth: Correspondence
Language: Profession Exclude From Trust
Accounting: Address Email/Telephone/Fax: Mobile
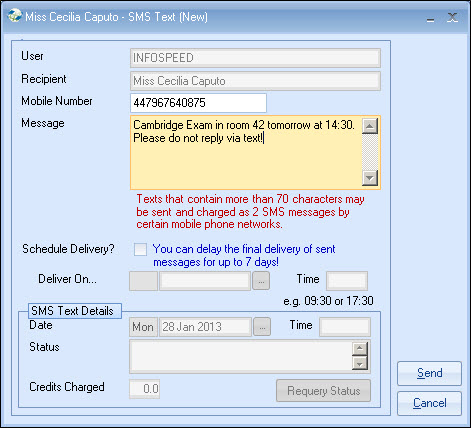
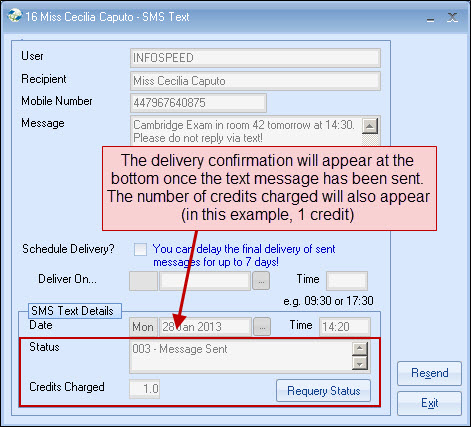
Number The mobile number may be used in
conjunction with the text messaging option within Class. Send
SMS Enquiry Source: Origin as Enquiry Follow up
on User Defined
Fields Enrolments Tab - see
separate Help for Enrolments. Special Note:
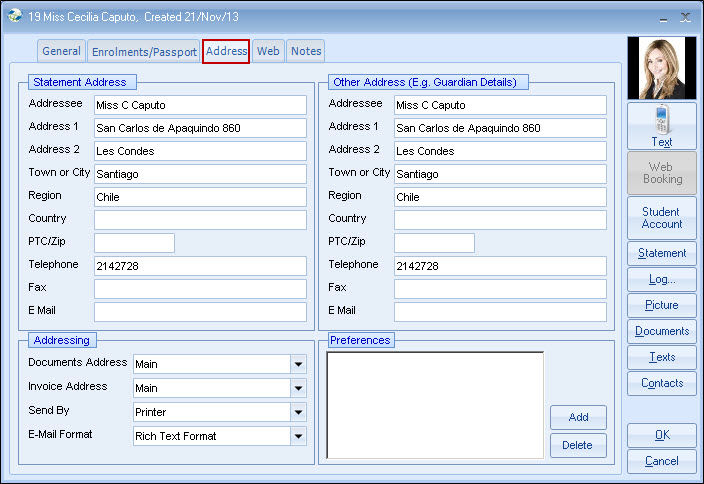
Enrolments - please see Enrolment Addresses
Statement/Other
Address Additional addresses may be added
from the "Contacts" button, eg. Private
accommodation, Next of Kin etc. Document Address Invoice Address Send
By Email Format Preferences Web
Allow
Student to Login via the Web? Password Verify Web
Login User Name Preferred
Date Format Notes Dated
Notes The Dated Note has a number of
features: Pop Up note
until..... Note History..... Link Note to..... Action By..... Information Only..... User Defined Fields Any number of user defined
fields can be added to the student record (they are displayed both in the
student and the enrolment screens). Fields can be grouped into Sections for ease
of use, as can be seen in the above example: Exams, University Placement, Work
Experience.
Each entry
consists of Section / Name / Date / Content and a Short
Note. All fields can be used in both Word merges and Quick
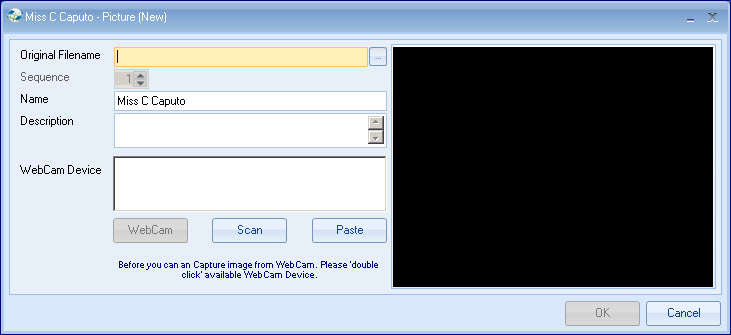
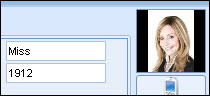
Reports. Picture Pictures can be merged
with Word documents, and also appear in the top corner of the student
screen.
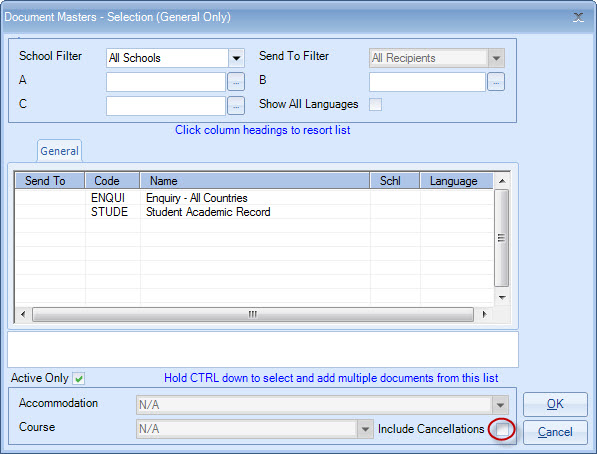
Documents Cancellations: only select if cancelled
Course or Accommodation records are to be included in merged
document. Add a document by selecting from the
list. Note: the Send By method may be edited at
this stage to enable it to be sent email/fax etc. Click View to see/edit or Send if no
editing is required. Enrolment/Passport Passport
No. Passport
Expires Passport
Country Country
of Birth Nationality Checked/Copied Checked
On Checked
By Text Messaging

Add new or edit existing
enquiries.
Copy an existing Student/Enquiry (See
also Enrolment copy - this allows both the copying of a student and the
enrolment - useful for family or similar bookings).
Enter approx 4-5
characters of the surname & press Find.
Matching records may be
displayed to see if a correct match.
If a match is
not found, Add Student (for an enrolment) or Enquiry.
Students entered without bookings are shown in red
It is suggested that, 4-5
characters are entered of the student's surname in the "search" box. Matching
names will be displayed, enabling a judgement to be made as to whether the
student's record is already present. If no match is found select "Add Student"
or "Add enquiry".
Student - After entry of the student details, the enrolment tab is
selected for "Adding" the enrolment.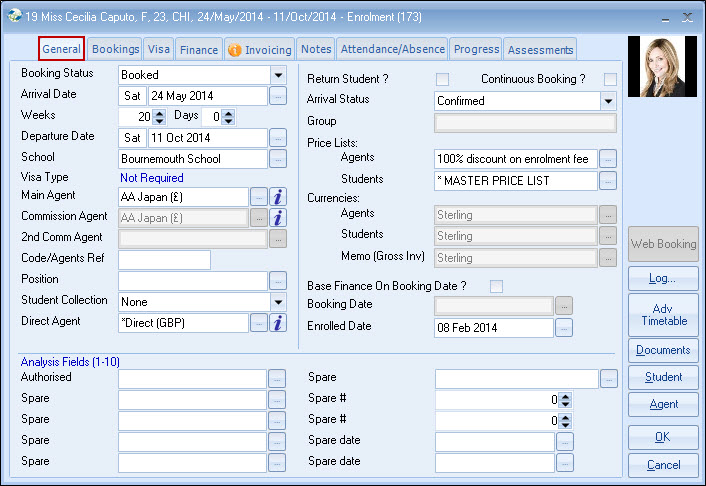
Enter as appropriate (45
characters each). Surname is mandatory.
Enter if required.
Note this is automatically created by the system, but may
be changed. If a Title is not entered, the addressee will comprise
Forename/Surname (45 chars).
M or
F
Spare field, often used as a cross reference to an old system, eg.
student number.
Normal
overseas residence.
Main Mother
Tongue.
Enter DOB or Age. If age is entered the system will assume
DOB as1st Jan, of the appropriate
year.
Normally left
unchanged.
If it is intended to create documents in multiple languages, then
a Student may be set to reflect the document language to be used. In the
document merge process only template letters designated with that language will
be displayed.
Optional.
Only used by countries intending to use Trust Accounting (eg.
Australia & New Zealand). Set if
appropriate.
Enter as appropriate, using
Town/City, Country, as indicated
Email - used by the system when
sending emails.
Enter in format CCnnnnnnnnnnn,
where CC is the country code for the mobile, excluding "00" or "+" e.g. for UK
44. Drop the leading zero. Eg. 07836574341, becomes 447836574341.
Tick if mobile may be used for
contact.
Enquiry
Source (if originated as an enquiry).
If Student originally entered as an enquiry, this will
be set correctly, but may be manually overridden if required.
Used generally as a follow up date
on enquiries (if required). Can be used in Quick Reports.
Complete as appropriate.
Note: Values can be selected from
list or alternatively a 30 character value may be added.
Fields showing 3 horizontal "bars" may be updated directly with a code
entry. On arrival at the field, the box will open to allow entry of a code, if
required. Alternatively, use the search box. (Code entry is not case sensitive. If a wrong
value is entered, use the delete key to remove the value).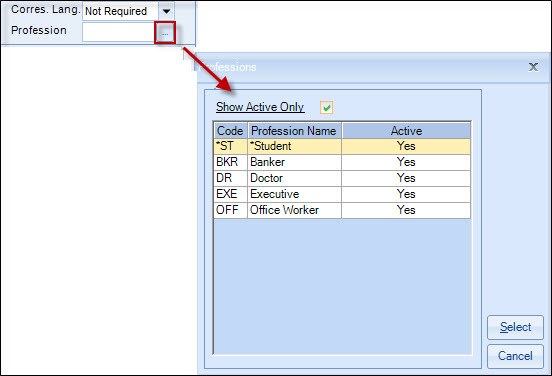
Statement or Other address may
be used if the address on screen1 (General) is not to be used for the statement
and invoice.
Select address to be used for correspondence.
Select address to be used for invoicing.
Printer/Fax or email.
Set to Rich Text, but if the recipient
advises format is unreadable, try HTML or simple text.
30 character
labels. Can be used in Quick Reports (see Settings > Students for setting the
preference items)
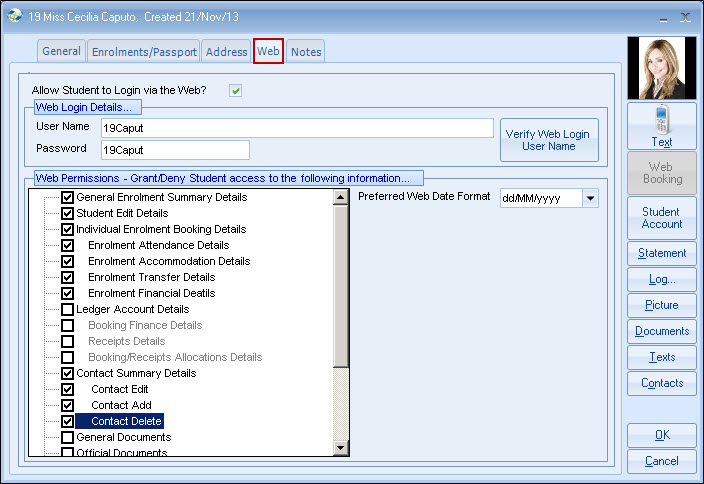
Set if this student is allowed access via
the web.
System rules determine how long after departure a student may access
his details.
User Name
Enter a user name (which must be unique
for the system) up to 250 characters long. It will default to the student's
email address.
Up to 10 characters long (case sensitive).
After entry of a new user name, you should verify that
the name is unique.
However, the system will always check before accepting
the record.
Web Permissions
Complete as appropriate.
Set European or USA format.
3 (total 7500 characters) notepads are available for
"permanent" type notes. It is suggested that variable notes eg. notes about the
students, their progress and any complaints etc, are recorded in the Dated Notes
section.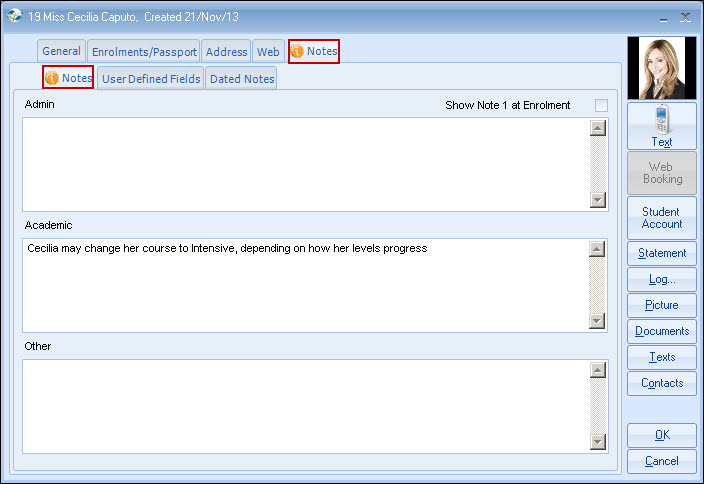
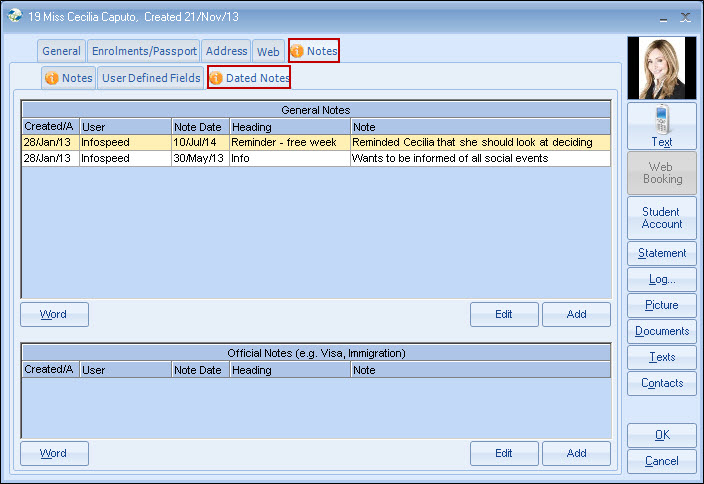
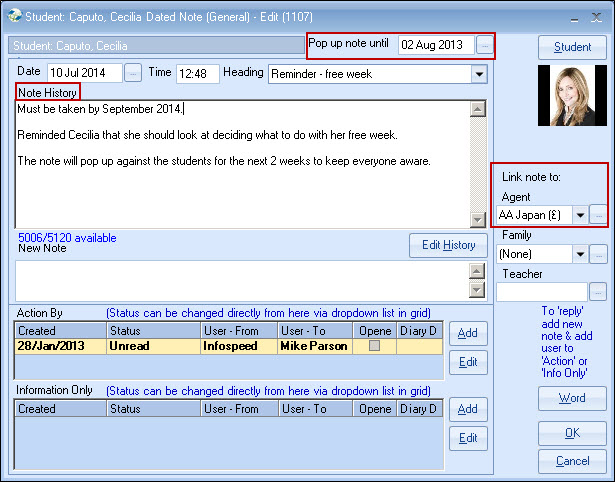
If a date is entered the note
will be automatically displayed (student and enrolments) until the date is
passed.
Each time a "new note" is added
(to progress the story!) the users id/date/time are entered, providing a
chronological sequence of events. Notes can only be changed (Edit History) if
the user has the relevant permission set or is an administrator.
If the note is linked to an Agent,
Family or Teacher, the same note will appear in their records. As it is a link
(ie. the same note) it will appear updated all the time!
The note can also be "sent" to a
user for action
Users "sent" the note as
information only receive them in blue,
making it easy for the user to recognise they do not need to take any
action.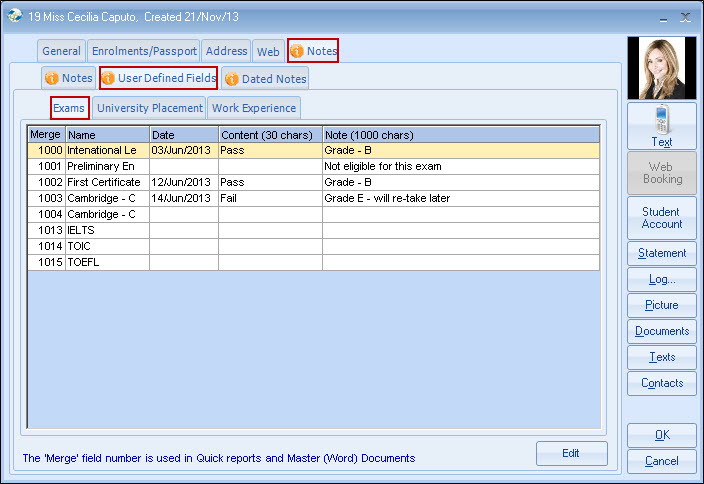
To set up fields and sections go to Settings > Students
> User Defined Fields.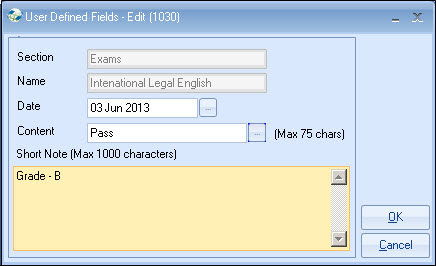
For Windows Vista/XP (and above), a special piece of imaging
software is required before photos may be inserted or pasted in: "Global 360
Imaging for Windows" - please contact Infospeed for details.
You can find an existing photo under its filename, you can
scan a photo in, or paste it from the clipboard.
Note: default settings can be changed by selecting "Header
Options"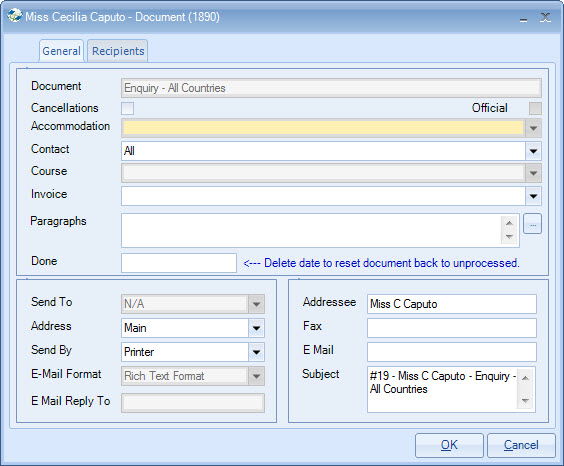
The document may be added
more than once, if for instance an email and printed copy is
required.
If Document Batch runs are being used then there is no
need to "Send", as the document is automatically sent by the batch
process.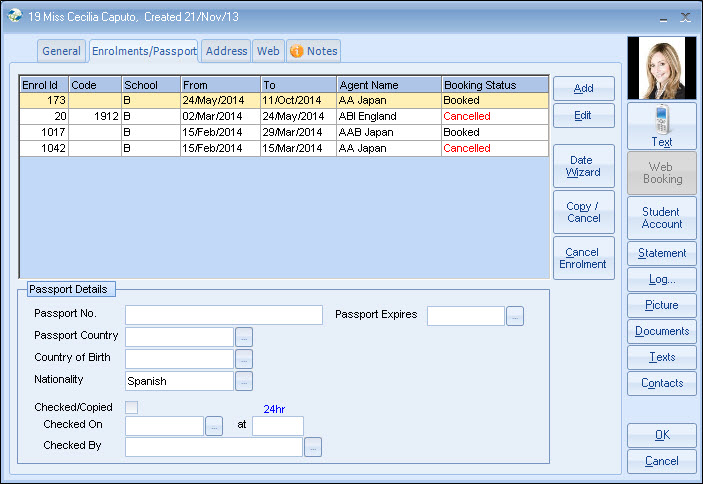
Enter the student passport number
if required.
Enter the student passport
expiry date if required.
Enter the country that issued
the passport if required.
Enter if required.
Enter if
required.
Tick if
passport details have been checked.
Enter the date and time when the
passport was checked.
Enter who checked the
passport.